What a Hot Water Tank Installation Actually Looks Like (From a Buffalo Plumber)
Ever wonder what goes into a water heater swap? Here is a real look at what MVP716 does on every hot water tank install — from shutting off the water to the final pressure test.
Most homeowners never see what happens behind the scenes when a plumber swaps out a water heater. You call, we show up, and a few hours later you have hot water again. But there is a lot of work that goes into doing it right — and doing it right is the difference between a water heater that lasts 12 years and one that fails in three.
Here is a real look at what we do on every hot water tank installation in Buffalo and Western New York.
Why Water Heaters Fail Early
Before we talk about the install, it helps to understand why water heaters fail in the first place. In Buffalo, the main culprits are:
Sediment buildup. Our water is hard. Minerals settle at the bottom of the tank, insulate the burner, and force the unit to work harder. Over time, that kills the heating element or the tank itself.
Anode rod corrosion. The anode rod is a sacrificial metal rod that protects the tank lining from rust. When it corrodes away completely, the tank starts rusting from the inside. Most homeowners never know the rod exists until the tank is leaking.
Improper installation. A water heater installed without proper dielectric unions, a functioning pressure relief valve, or correct venting will fail faster and can be dangerous. We see this on plenty of DIY installs and some contractor work too.
What We Do on Every Install
Step 1: Shut Off the Water and Power
Before anything else, we shut off the cold water supply to the existing unit and cut power at the breaker (electric) or shut off the gas valve (gas). We never skip this step, and we verify the shutoff is holding before we touch anything else.
Step 2: Drain the Old Tank
A 40 or 50-gallon tank is heavy. We connect a hose to the drain valve and run it to a floor drain or outside. Depending on how much sediment has built up, the water coming out can look like sand. That sediment is one of the main reasons the old unit failed.
Step 3: Disconnect and Remove
We disconnect the supply lines, the discharge pipe from the pressure relief valve, and the vent pipe (on gas units). Then we remove the old tank. On tight installs — utility closets, crawl spaces, tight basement corners — this is where experience matters. We have pulled tanks out of spaces that looked impossible.
Step 4: Inspect the Existing Connections
Before the new unit goes in, we inspect the existing copper or flex supply lines, the shut-off valve, and the venting. If the shut-off valve is old or corroded, we replace it. If the flex connectors are original to the house, they go too. We are not going to install a brand-new water heater on 20-year-old connections.
Step 5: Set the New Unit and Make Copper Connections
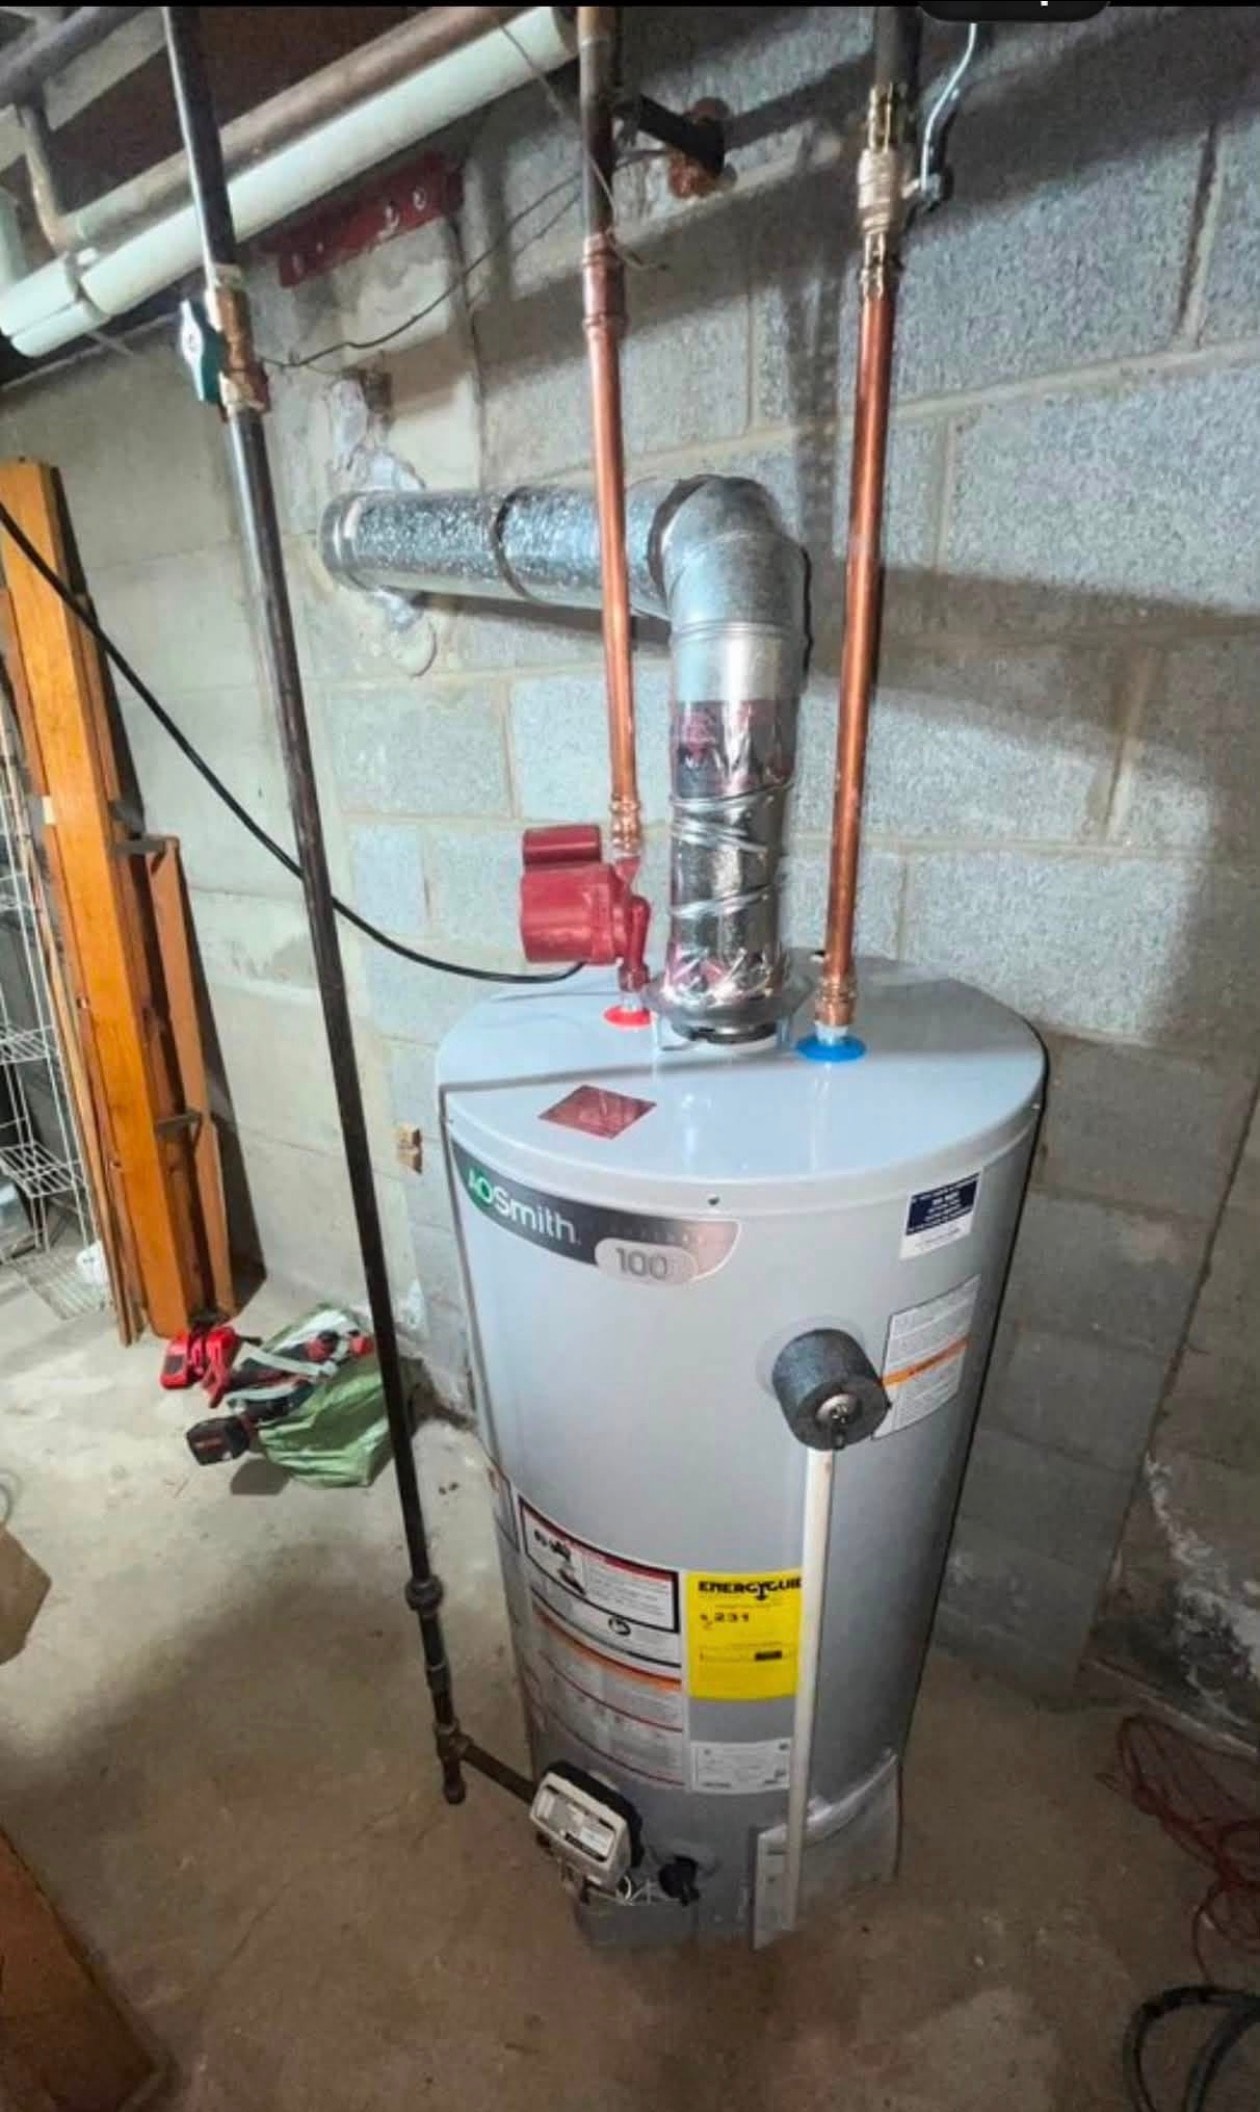
We set the new tank in position and make the supply connections. On most of our installs, we use copper with sweat fittings or press-fit connections — not the cheap braided flex lines that come in the box. Copper lasts. It does not corrode, it does not kink, and it does not fail at 2 AM.
We install dielectric unions where copper meets the tank nipples to prevent galvanic corrosion. We install a new pressure relief valve and run the discharge pipe to within 6 inches of the floor — code requirement, and a safety one at that.
Step 6: Relight or Reconnect Power
On gas units, we relight the pilot and verify the burner is firing correctly. On electric units, we restore power at the breaker. We check for gas leaks on every gas install — no exceptions.
Step 7: Fill, Purge, and Pressure Test
We open the cold supply and let the tank fill completely before restoring power or relighting. Energizing a dry heating element destroys it immediately. Once full, we open a hot water tap to purge air from the lines, then check every connection for leaks under pressure.
Step 8: Set the Temperature and Walk You Through It
We set the thermostat to 120°F — hot enough to kill bacteria, cool enough to prevent scalding. We show you where the shut-off valve is, how to operate the pressure relief valve, and what to watch for as the unit ages.
What a Real Install Looks Like
On a recent job in Buffalo, we replaced a failed 40-gallon electric unit in a tight utility closet. The old unit had no dielectric unions, the shut-off valve was seized, and the flex connectors were original to the house — probably 15 years old.
We replaced the shut-off valve, ran new copper supply lines with proper dielectric unions, installed a new pressure relief valve with a full-length discharge pipe, and set a new 50-gallon electric unit. The homeowner had hot water within two hours of our arrival.
That is what a proper install looks like. Not just swapping the tank — doing the whole job right so the new unit lasts as long as it should.
How Long Does a Water Heater Installation Take?
Most standard tank replacements take 2 to 3 hours. Tight spaces, corroded connections, or code upgrades can add time. We give you an honest estimate before we start and we do not leave until everything is working and clean.
Signs You Need a New Water Heater
- No hot water or inconsistent temperatures
- Rusty or discolored water from hot taps
- Popping, rumbling, or banging noises from the tank
- Water pooling around the base of the unit
- Unit is 10+ years old
If you are seeing any of these in your Buffalo home, call us at 716-329-2701. We offer same-day water heater replacement throughout Erie County with upfront pricing and no surprise fees.
Explore Topics
Written by
Most Valuable Plumber LLC
Content creator and writer sharing insights and stories.